JavaScript is not currently enabled, but is required for full
CodeSonar manual search and browse functionality.
If you are viewing this file in your hub's Web GUI, enable
JavaScript in your browser: you will also need it for GUI
functionality.
If you opened this file directly from disk, your browser may be
directly suppressing JavaScript functionality: certain browsers
perform this suppression on local files (but not files delivered by
web servers) for security reasons.
-
If you access the manual through the hub's Web GUI, the
functionality will not be suppressed because the hub is a web
server.
-
Alternatively, your browser may allow you to explicitly
disable the security setting that suppresses functionality. See
the CodeSonar
FAQ for more information.
Installation: Hub Setup: Starting a New Hub
This section is for users who need to start a new CodeSonar Hub as part of the CodeSonar
installation. It explains the factors involved in deciding on a hub
location and describes how to start the hub.
Creating a CodeSonar hub involves several major steps.
- A. Decide where to store the hub
database and where to run the hub.
- B. Perform any necessary
preliminary steps.
- C. Start the hub.
The remainder of this page describes these steps and provides
links to further information.
If you need to start a new hub, but prefer to run the hub in a Docker container, follow
the instructions in Installation: Hub Setup: Starting a New Hub with Docker images from artifacts.codesonar.com instead.
You can also install CodeSonar on a Kubernetes cluster and run a
hub pod:
To configure CodeSonar, you will need to determine where to store
the hub database and where to run the hub.
-
Choose a hub
machine and interface using the following
table.
| Number of Users |
Analysis /Result Browsing Machine(s) |
Hub Machine |
Hub Interface |
| one |
All analyses take place on one machine, and you will
browse analysis results from the same machine. |
The same machine as the analyses. |
Run the hub on a restricted interface such as
::1.
(See the IPv4 note if your system does
not support IPv6 addresses.) |
| one |
Analyses or result browsing (or both) may take place on
machines other than the hub. |
Choose a hub machine that all analysis
machines/users and hub browsing machines/users can access.
Ensure, however, that your hub is not visible to the entire
internet. |
Are the hub machine and all users behind a firewall?
- YES: Run the hub on :: to listen on all interfaces.
- NO: Specify a restricted interface such as
::1, and use a VPN to
connect.
For a detailed example, see Task: ssh Tunnel to a
Hub.
(See the IPv4 note if your system does
not support IPv6 addresses.)
|
| multiple |
All cases. |
- Determine how many hubs you will need.
Do you have a machine that is accessible to all hub users and can
handle the number of connections that this entails? All analysis
machines, and all users that will want to use the web GUI, must be able to connect to the
hub.
- YES: You can run a single hub on that machine.
- NO: you will need to run multiple
hubs.
Do you want all hubs to share a single hub database?
- YES: Set up an initial ('primary') hub and then
add one or more satellite hubs to
accommodate all the users.
- NO: Set up as many separate hubs as required. You may
wish to use CodeSonar's annotation
import/export functionality to mirror warning
annotations across the different hubs.
- Choose a location for the hub
directory (where the hub database will be stored) by
considering the number of projects that the hub will manage. The
hub directory must be a directory on the hub machine.
You do not need to create this directory: CodeSonar will create
it for you.
- If the hub has results for only a single project, the hub
directory can be located alongside the project code (if
desired).
- If the hub has results for multiple projects, it usually
makes more sense to create the hub directory in a "neutral
location" than to have it alongside the code for one of
those projects.
- In either case, the hub directory must be located outside the
CodeSonar installation directory.
- Use file system security controls to restrict access to the
hub directory: users that will not have hub administration
privileges should not have access to the directory.
- Choose a strong, memorable password for the
hub
Administrator account. You
will be prompted to set a password for this account during the hub
setup procedure.
The Administrator account has a
broad range of hub permissions: setting a weak password will
substantially undermine hub security.
By default, the following minimum password requirements apply.
- Minimum length: 12 characters
- Minimum number of character classes (e.g. 'upper case', 'lower case', 'digit'): 3
-
As part of the hub setup process, you
will be prompted to create an ordinary hub user account.
Select a name and password for this account now.
- You can use the ordinary hub user account for regular
CodeSonar tasks, such as running an analysis or browsing
analysis results.
- The password must conform to the requirements provided in
the previous step.
- You can create additional ordinary hub user accounts once
the hub is set up.
Make sure your user account and machine are ready to start a
hub.
- Determine whether you have sufficient user permissions to run
software that listens on any port.
If not, a system administrator will need to start the hub.
- Make sure you are logged in as an ordinary user: the hub cannot
be run as root.
This user must have write permissions for the following, where
$CSONAR is the
CodeSonar installation directory.
- $CSONAR/codesonar/template.conf
- $CSONAR/codesonar/default_presets/
- $CSONAR/codesonar/presets/
- You will need to expand the shared
memory. See Running a Hub Under
Linux.
Once you have made the important decisions
and performed the preliminary steps,
start the hub.
The hub should be started on the
machine you selected in step A.
- If the CodeSonar
configuration tool is not already running on your selected hub
machine, start it now.
codesonar config
Windows users can also select CodeSonar
> CodeSonar Configuration Tool from the Windows Start
menu.
The configuration tool main
menu will be displayed. You may need to scroll or enlarge
your window in order to see the full menu.
- Enter 2 at the prompt to
select option 2 ("Install, create hub") from the main
menu.
- The configuration tool will ask you for various information
about the hub you want to start.
- ... the kind of hub you would like to create.
- Enter 1 at the prompt
to select option 1 ("Create new primary
hub").
(If you want to add satellite hubs to this primary hub, you
can do so later.)
- ... the interface the hub should use.
- ... the port number for the hub.
- Enter the port on which the hub will listen. The
default is 7340.
CodeSonar will check to make sure the port is available.
- ... the
hub directory (see
the directory decision notes
above).
- Enter the absolute path to the hub directory.
- ... [Windows only] whether the hub should run as a service
(see section CodeSonar
as a Windows Service for more information).
- Enter the menu option number corresponding to your
preference.
- The tool will ask for various information in order to determine
how you want this CodeSonar installation to interact with the new
hub when you perform analyses.
- ... a username for a new hub user account.
- ... an email address for the new hub user.
- Enter a suitable email address.
- ... whether analyses with this installation should use this
hub by default.
- Enter the menu option number corresponding to your
preference.
- ... which kinds of C/C++ warnings to detect, that is, which
configuration presets
you want to define as default
presets for all analyses. You may enable or disable one or
more presets while creating the new hub. Note that you may
choose to run analyses without processing the default presets
by specifying -no-default-presets
in your command.
- Enter the menu option number corresponding to your
preference.
- ... your preferred tradeoff between analysis performance
and result quality.
- Enter the menu option number corresponding to your
preference, then confirm your choice.
- ... the level of analysis parallelism to use
for analyses on the new hub.
- Enter the menu option number corresponding to your
preference.
Note that this setting pertains to analyses performed by
you, on this machine, with this CodeSonar installation, on
the new hub.
- ... whether analyses should utilize the hub's
analysis cloud: that is, whether they should be distributed
analyses.
- Enter the menu option number corresponding to your
preference.
- ... whether analyses should contribute to the
hub's analysis cloud: that is, whether you want to
contribute resources (where available) to distributed
analyses, including those started on other machines, or by
other users, or by other CodeSonar installations.
If you answered "Yes" to the previous question we
strongly recommend that you answer "Yes" to
this question. If you answer "No", your launch daemon will not
start slaves for any distributed analyses, including
your own.
- Enter the menu option number corresponding to your
preference.
- ... the parent launchd
group for the launch daemon that your
analyses will use to communicate with the hub.
- Enter / to specify the
root launchd group.
- ... [Windows only] whether the launch daemon should run as
a service (see section
CodeSonar as a Windows Service for more information).
- Enter the menu option number corresponding to your
preference.
- The tool will provide information or functionality for
accessing the new hub's License Utilization
page.
The license key setup instructions cover signing into the hub and
locating the License Utilization page, so you don't need to
open it now.
- [Windows] The tool will ask whether you want to view the
License Utilization page once the hub has been created.
- [other systems] The tool will print a message specifying
the License Utilization page URL.
- The tool will prompt you to specify a password for the hub
Administrator account.
[Windows only] If the hub appears to be taking a long time to
start, it may be waiting for services authentication. (If you are
working in other windows while running CodeSonar those windows
might be obscuring the authentication dialog: if you don't
see a dialog, move the other windows to check underneath). See
CodeSonar as a Windows
Service for more information.
- Once the hub has started, the tool will prompt you to specify a
password for the new ordinary hub user account.
- You will be prompted to provide authentication credentials so
that CodeSonar can start a launch daemon to communicate with
the hub.
- Enter the password for the ordinary hub user account that
you have just created.
- When prompted, press Enter to
continue.
- If User Account Control is enabled, your system may request
permission for CodeSonar to start a launch daemon.
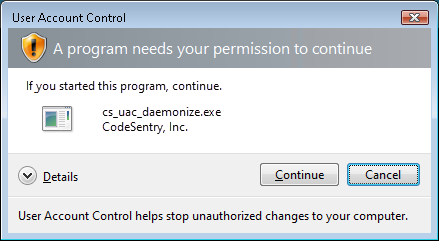
Click Continue to
proceed.
- When prompted, press Enter to
continue.
- The configuration tool main
menu will be displayed, and your new hub should appear in the
table of known
hubs.
- If there is a firewall on your system, you may need to
configure it to permit connections to and from the hub. See
FAQ: How do I allow hub access
through a firewall?.
- Go on to Hub Setup: Hub License
Key.
If you specify a port that is already in use, the CodeSonar
configuration tool will print a "FAILURE" message. A common
reason for failure is that you (or someone else) are already running
a hub at the port you specified, in which case you may be able to use
that hub instead of starting another one.
- Press Enter to indicate that you have
read the message.
You will be prompted again to specify the interface the hub should
use.
- Type main_menu() and press
Enter to abandon hub setup and go back to
the configuration tool main menu.
- Check the table of known hubs. Is there a hub running (status
"ONLINE") at the port you specified?
- YES: there are several possibilities.
- The hub belongs to a different user on the hub
machine. If this hub has already been set up and has a
license key, you may wish to use it instead of starting a
new one. Otherwise, you will need to try again with a
different port: go on to the next step.
-
The hub belongs to you but you haven't finished
setting it up yet. Pick up the hub setup process from
wherever you left off.
- The hub belongs to you and needs upgrading.
Follow the instructions in Installation: Hub Setup: Upgrading
an Existing Hub to upgrade the hub.
- The hub belongs to you and is ready to use. If
the hub is running the current version of CodeSonar and has
been completely set up and configured, go on to Installation: Finishing
Up.
- NO: you will need to try again with a different port. Go on
to the next step.
- Enter 1 at the prompt to
select option 1 ("Create new primary hub").
- Press Enter to specify the same
interface you specified last time.
- When prompted for a port, enter a different value (for example,
7341). If a lot of ports are in use, you may need to try several
times before you find one that is free.
If necessary, open a new prompt and run the following command to
see the ports that are currently in use.
netstat -a
- Once you have specified an available port, the configuration
tool will print a "SUCCESS" message. Go on to the next
step: specifying the hub
directory.
Other Troubleshooting
The following entries from Frequently Asked Questions: Hub and User
Accounts are particularly relevant.
If your system does not support IPv6 addresses, use IPv4 to
specify addresses instead.
- 127.0.0.1 instead of
::1
- 0.0.0.0 instead of
::