JavaScript is not currently enabled, but is required for full
CodeSonar manual search and browse functionality.
If you are viewing this file in your hub's Web GUI, enable
JavaScript in your browser: you will also need it for GUI
functionality.
If you opened this file directly from disk, your browser may be
directly suppressing JavaScript functionality: certain browsers
perform this suppression on local files (but not files delivered by
web servers) for security reasons.
-
If you access the manual through the hub's Web GUI, the
functionality will not be suppressed because the hub is a web
server.
-
Alternatively, your browser may allow you to explicitly
disable the security setting that suppresses functionality. See
the CodeSonar
FAQ for more information.
Build the Sample Program (Windows)
The first step in analyzing a program is always to
build it as a
CodeSonar project. The CodeSonar build wizard makes building in
Windows a straightforward process.
The CodeSonar project build system is designed so that you can
base a CodeSonar project on your normal software build process. In
general you will:
- start up your usual build environment,
- use the build wizard to identify your build environment to
CodeSonar,
- build your software project in the usual way, and then
- instruct CodeSonar to generate a project based on the software
build.
Starting Up
- See the note on
16-bit processes.
- Save a copy of BasicProj.c to the working directory (right-click
on the link and select Save Target As... or
equivalent).
Make sure your browser does not append any file extension (such as
.txt) to the downloaded file. If
it does, rename the file back to BasicProj.c.
- Start the Windows build wizard: either
- select
 from the Windows
Start menu, or
from the Windows
Start menu, or
- open the wizard from the desktop CodeSonar icon
 , or
, or
- use the Windows file explorer to navigate to the
\codesonar\bin subfolder of
the CodeSonar installation folder
(in many cases, the path will be C:\Program
Files\CodeSecure\CodeSonar\codesonar\bin),
then double-click hookcs (or
hookcs.exe) in that
folder.
- Start up your normal build environment:
| Microsoft Visual Studio: |
We have provided a Visual Studio solution BasicProj.sln and
project BasicProj.vcxproj.
- Save copies of these to the same directory as your
copy of BasicProj.c.
- Open BasicProj.sln
ready for building.
Your Visual Studio installation will display messages if
it does not have the SDK (or "target platform")
version or platform toolset specified in the example
project.
If you don't encounter such messages, go on to setting
up the CodeSonar build/analysis in the Windows build
wizard. Otherwise, use the Visual Studio GUI to modify the
BasicProj settings before
proceeding.
- Right click on the BasicProj project in the Solution
Explorer, and select Properties from the menu that
pops up.
- Navigate to Configuration Properties >
General.
- Make sure the following are set to suitable values.
The Visual Studio GUI will provide a menu of available
settings.
- Target Platform Version / Windows SDK
Version (name will depend on your Visual Studio
installation)
- Platform Toolset
|
| Otherwise: |
Start up your usual build environment and do any
preparation necessary for building BasicProj.c into a software
project. |
You might like to do a practice build to make sure everything is
working properly (if you do this, make sure you "clean
up" afterward, so that next time you build everything is
rebuilt fully).
Wizard, Screen 1
The first screen of the wizard looks like this:
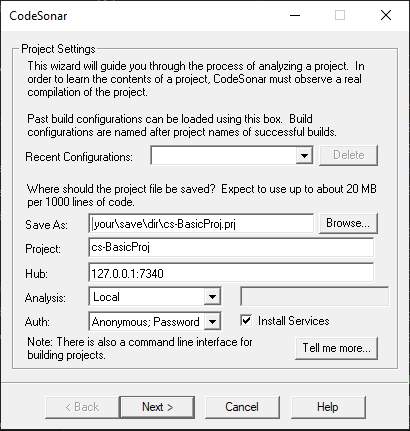
CodeSonar will generate a default project name and output
directory using a simple numbering scheme. You can specify your own
values for these - we will call this project cs-BasicProj
- Specify where CodeSonar should store local files related to the
analysis:
- Type dir\cs-BasicProj.prj into the
Save As edit box (where dir is your working
directory), or
- Click the Browse... button. Using the directory
browser that opens to choose a directory, and type cs-BasicProj.prj into the File Name
field of the browser.
- Specify the project with which the analysis should be
associated on the hub.
- Type cs-BasicProj into the
Project edit box.
- Make sure the Hub text field contains the correct
location host:port for your hub (as determined in the
previous step).
- Make sure the Auth menu selection is "Anonymous;
Password ".
- Use the Analysis field to specify how the analysis
should be managed. This setting depends on whether or not you are
using CodeSonar SaaS.
| CodeSonar SaaS: |
SaaS
|
| otherwise: |
Local
|
- Make sure that Install Services is selected, unless this
will cause a problem. If you do not wish to use Windows Services,
unselect Install Services. CodeSonar will still run, but you
will need to restart the hub manually if the hub machine is
restarted.
As a shortcut, the Recent Configurations pull-down menu
contains recently-used configurations. If this is your first
project, there will not be any previous configurations in the
menu. Once you have (successfully) built some projects, you will
likely find there are certain build configurations that you use
regularly and this shortcut will save you some time in setting up
new projects.
- Click Next.
Wizard, Screen 2
The second screen of the wizard looks like this:
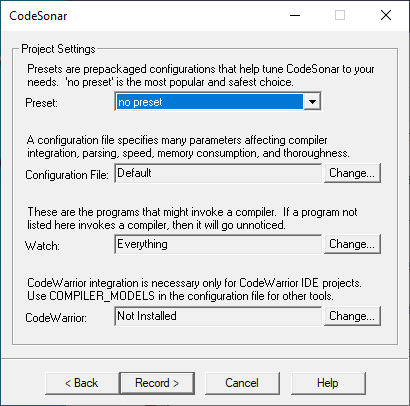
The Watch field indicates the programs that CodeSonar will
watch in order to create the project.
- To select one or more programs to watch, click the
Change button.
CodeSonar will open a new window showing the programs that are
candidates for watching.

- Click to select the program or programs that you are using to
build your project ().
- All child processes of the selected entries will also be
watched.
- To select multiple entries, hold down the Control
key as you click.
- If you are using a build system that is invoked from the
command line, such as make,
select the entry corresponding to your shell or command prompt
(in the example above this would be
bash.exe).
In most cases users of such build systems will prefer the
command line build. If you want to use the command
line build for this tutorial, close the build wizard and
choose another build option.
Otherwise, continue with the remainder of this section.
In the example above the program is being built in Microsoft
Visual Studio, so the MSDEV.EXE program has been selected from
the list.
- When you have completed your selection, click the OK
button.
Once you have finished the setup steps on this screen, the
wizard is ready to build the CodeSonar project by
"recording" your usual build.
- Click Record.
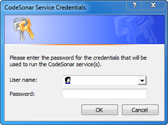
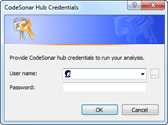
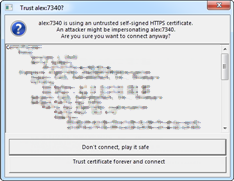
One or more of the following dialogs may open. If you are not sure
how to resolve them, follow the links in the table for additional
information.
Screen 3
Once you have worked through the dialogs (if any), the third
screen will open. It looks like this:
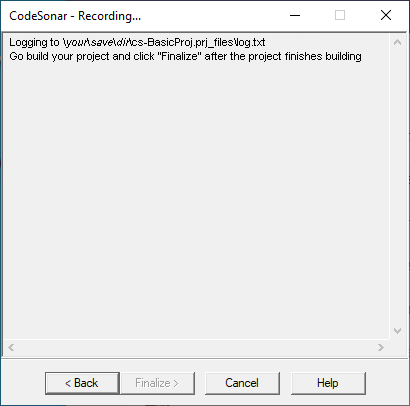
- Go to your build environment and invoke the build of
BasicProj.c.
The wizard will display compiler messages as the build
progresses. When the build is complete, the Finalize
button will become active.
- Click the Finalize button.
When you click Finalize, CodeSonar will build the project
and then run the CodeSonar analysis. The degree of parallelism in the
analysis will depend on the setting of ANALYSIS_SLAVES.
Screen 4
The fourth and final screen of the wizard informs you that the
project is ready and provides some additional information.
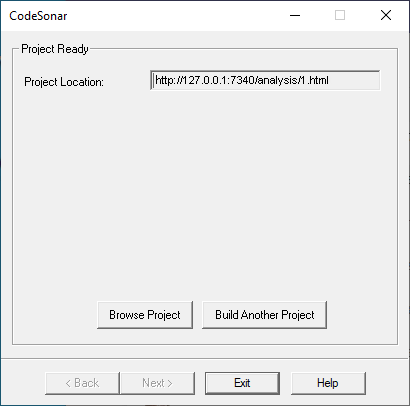
The Project Location field specifies the location of the
analysis results.
Now you can start browsing the analysis results:
- Click the Browse Project button to open the Analysis
page in your web browser.
The CodeSonar GUI may display a message requesting that you
sign in.
This indicates that the hub has been configured to prohibit
anonymous browsing. If so, the hub Administrator should have
informed you of your hub user account credentials.
- Use the credentials provided by your hub Administrator to
sign in.
- Go on to Analysis Page and Warning
Reports